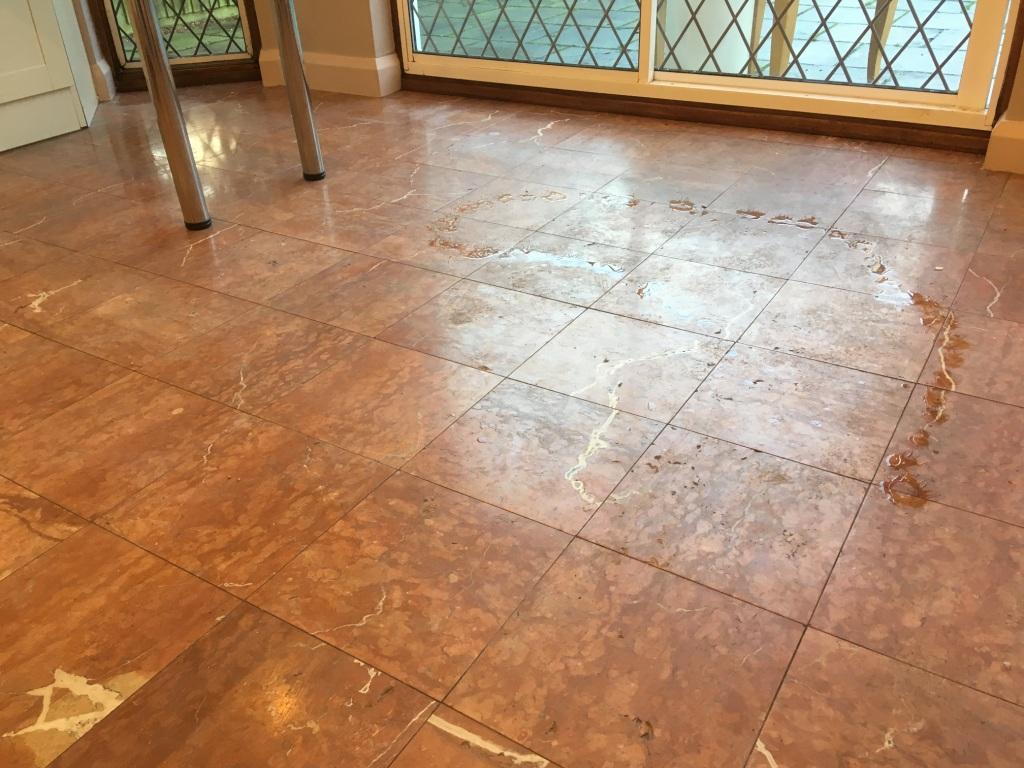
If you have a Mable tiled floor which is not looking its best, then the transformation I achieved on this floor at a property in Weybridge will definitely be on interest. Having first spoken with the owner on the phone I went over to the house to take a better look at the floor and found that the deep red and brown Marble tiled kitchen floor was really dirty and totally lacking in colour or polish.
The floor hadn’t been professionally cleaned for some time and was now dirty and suffering from the actions of a puppy which likes to charge up and down. The Marble was also full of holes which the client explained had been getting larger. This is not usual for natural stone as it can be very sensitive to acidic cleaning products which if used constantly over time will start to dissolve the stone.
We discussed the remedies available, agreed a cost and arranged a mutually convenient time to carry the work out. I always like to do a site visit to survey the tiles and ideally run a test clean to determine the best methods for resolving the problems. This enabled me to give a more accurate quote and it also gives the customer confidence in my abilities.

Deep Cleaning Red and Brown Marble Kitchen Tiles
Firstly, I removed the existing sealer with a 400-grit diamond burnishing pad which is applied with water. Although this initially appears to make the floor look worse, this is only temporary, sometimes you have to make it look a little worse before it can get better! Once this was done the floor was rinsed with water to remove the slurry generated and this was then extracted off the floor with a wet vacuum.
Then for the next couple of hours I worked my way from the back door to the front filling all holes with a special expanding resin, then smoothing off as I went to ensure the smoothest of finish could be achieved. Some of the holes were indeed quite large, so there was quite a lot of work to do.
Once the filler had dried I started the polishing process using the 800 and then 1500 grit burnishing pads, once again with more water to lubricate and rinsing the floor in between polishing and removing the slurry as before. This process took much of the day, so I left the floor to dry off and came back the next day to complete the polishing and seal the Marble.
Sealing Red and Brown Marble Kitchen Tiles
The next day I returned and completed the polishing process by applying the fourth burnishing pad which is an extra fine 3000 grit pad, you apply the pad dry with only a little amount of water sprayed onto the floor in process we call a spay burnish and this final pad really brings up the polish in the Marble.
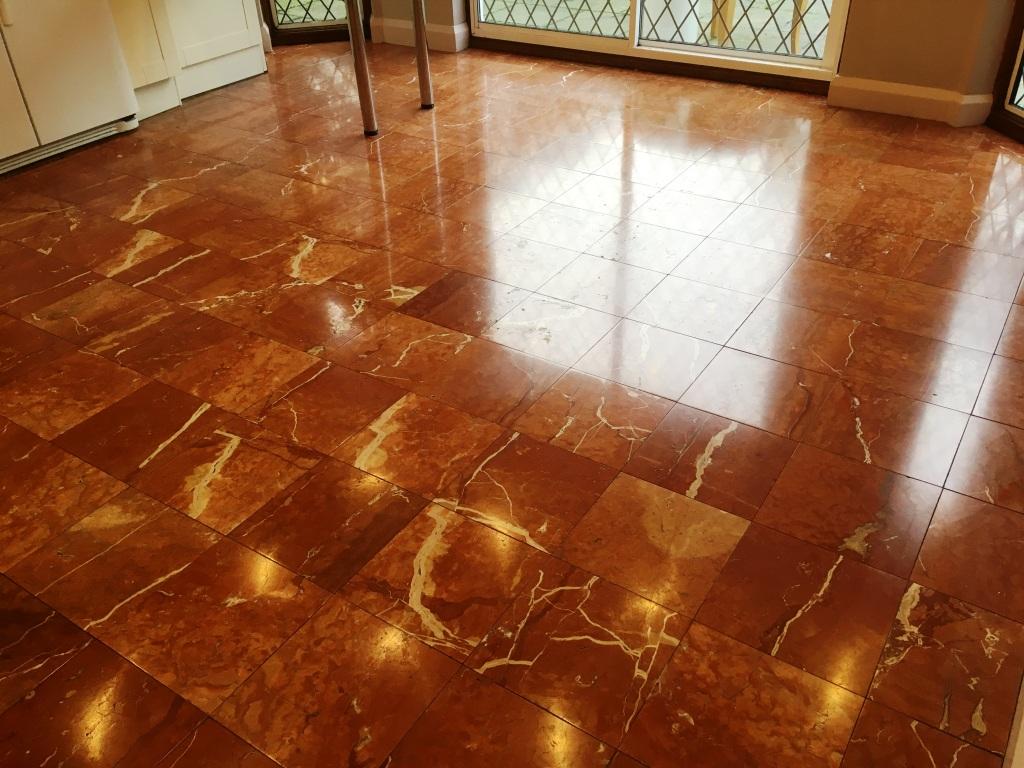
Once the polishing had finished I left the floor for a little while to make sure it was nice and dry and then I applied two coats of Tile Doctor Colour Grow sealer. This is a colour intensifying sealer that provides durable protection by impregnating the pores in the stone with sealer, so dirt cannot become ingrained there. As you can see from the pictures the sealer dramatically enhanced the natural colours in the stone.
Once dry I backed my way out of the house with a final finishing polish using a white buffing pad to remove any excess sealant and bring up the sheen of the tiles even further. I left instructions with the client to keep off for a couple of hours while the sealer cured.
The client was over the moon with the end result, the floor was left shiny, protected and looking in a fabulous condition.

Source: Marble Tile Cleaning and Sealing Service in West-Surrey
