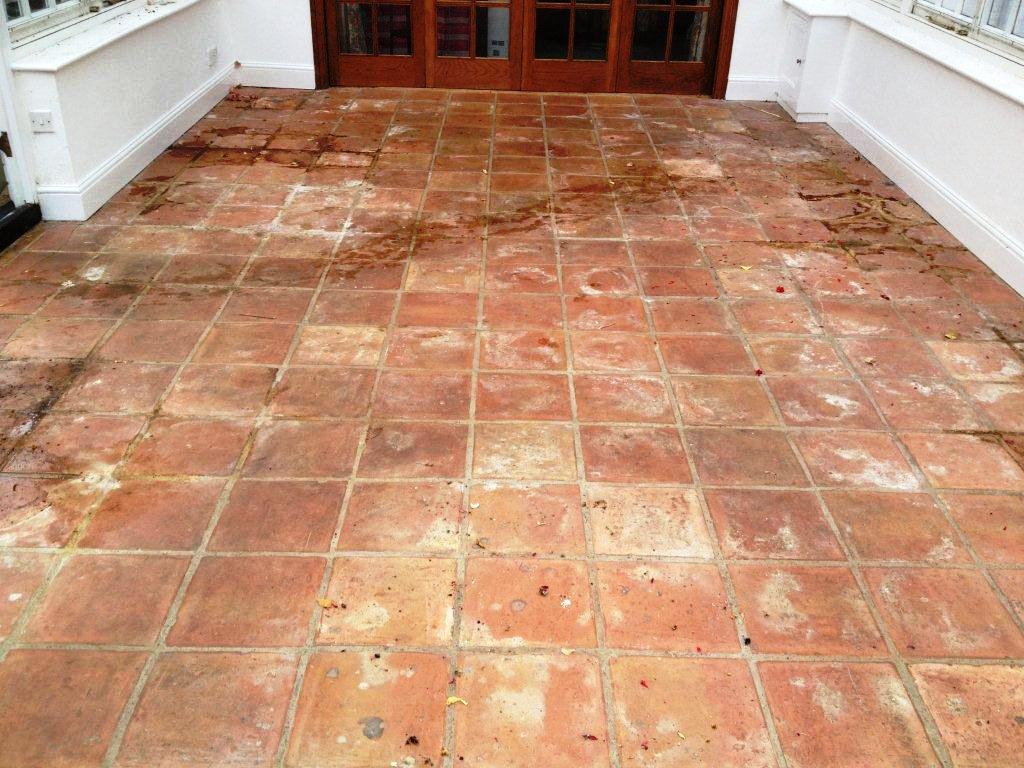
This Terracotta tiled floor installed in a conservatory in Kidlington Oxfordshire was in the worst condition I have ever seen, you should be able to make out a large amount of stains quite easily yourself in the photograph below. The conservatory had been used as a greenhouse with many plant pots sitting directly on the tile which over the years had led to the staining and a build-up of white salts on the surface.

Cleaning Terracotta Tile
My first step was to give it a good hoover to remove any loose detritus; I then covered the floor in a dilution of Tile Doctor Pro Clean which was left to soak into the Terracotta tile for a few minutes. Pro-Clean I should add is a heavy duty alkaline cleaning product designed for cleaning tile, stone and grout. The next step was to scrub the floor with a black scrubbing pad fitted to a rotary machine; after the scrubbing was done I rinsed with water and removed the waste with a wet vacuum. I then repeated the process again tackling the grout this time with a stiff brush before thoroughly rinsing with a high pressure spinner tool to totally flush the floor. The next step was to rinse the floor with Grout Clean Up which is an acid wash to remove all the salts in the floor, after that I rinsed the floor with the spinner tool again.
Sealing Terracotta Tile
I left the floor to dry overnight and the next day came back to do the sealing taking care to use a moisture meter of the floor first to ensure it had dried sufficiently . I used Tile Doctor Seal and Go to seal the floor, it’s a water based sealer so it doesn’t give off an odour when it’s drying and also offers durable stain protection together with a low sheen finish. It’s also a breathable sealer which will allow moisture to rise up through the floor and evaporate on the surface rather than trapping it beneath the seal.

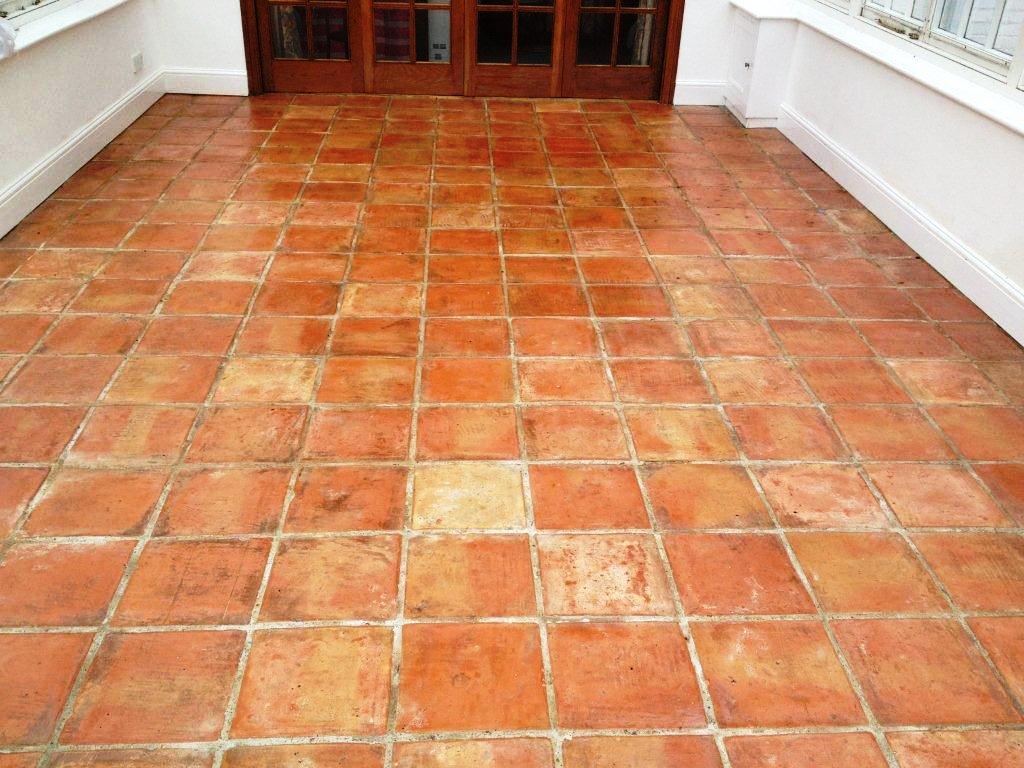
The floor was transformed by this process and I think you will agree this is confirmed by the before and after photographs above which really speak for themselves.

